Posts

Showing posts from October, 2011

13 Halloween Manis Wrap-Up!!!! (Pic Heavy)

Image
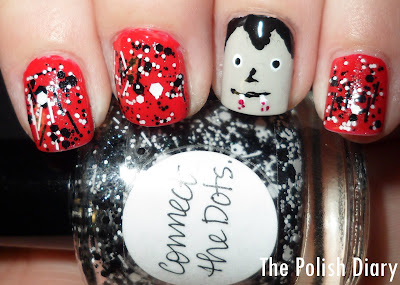
I must say I have had so much fun over the past few weeks with coming up with all the ideas for the manis as well as doing them. Some were fails and some I wanted to wear the whole time. It sucked because I would do an awesome mani but have to take it off because I needed another post. I know for next year what I want to do and what I don't. Without further adue here are all 13 of my Halloween themed manis. Link is under each photo for original post. Dracula with Lynnderella Connect the Dots Hanging Spider Mummy Nails Broken Bones Candy Corn Pumpkin Fail Blood Red Feather Mani Lynnderella & Spider Webs Tombstones Ghost & Franken Blood Drips Frankenstein Jason Mask Glowing Jason Mask I hope you guys enjoyed this little series as much as I did. I hope you have a safe and happy Halloween!

The Final Day of 13 Days of Halloween Nails - Saved the Best For Last!!

Image
Happy Sunday everyone! I must say I am glad I am not digging out from snow right now. This weather is just crazy! I have to say I am looking forward to sweaters and boots and layers but not yet. I am enjoying this mild cool weather we are having. Well enough about that stuff because I have certainly saved the best mani for the last day of 13 Days of Halloween Nails. I must say first that I have searched high and low for China Glaze Ghoulish Glow and could not find it anywhere. My Sally's got one shipment of their Halloween polishes and those were gone within a day. As of Friday they still had no in stock. Well yesterday I came home from work and my BF was waiting, gift-in-hand, to celebrate our Five Year Anniversary! It was GHOULISH GLOW! So I had it in my mind that I wanted to do a Jason Mask mani with Ghoulish Glow if/when I could ever get it. I had staged my 13 Days of Halloween Manis to end Sunday, with a wrap-up on Monday. I honestly had kind of given up on the idea because

13 Days of Halloween Nails- Day #12 - Frankenstein

Image
Hope you guys are having a great Halloween Weekend. I totally forgot about today's post because it is my BF and I, 5 year anniversary! Whoohoo! I did this mani before I had to cut my nails back down to nubs :( I saw everyone tryin this mani out and I wanted to give it a try. My Frankenstein has some crazy eyes but other than that I love him. OPI Don't Mess With OPI - Base of All Nails Sinful Colors Irish Fever - Applied over Don't Mess With OPI Wet n Wild Black Creme & White Creme - Frankenstein Hair & Face & Eyes OPI Black Shatter I have one mani left that I will post tomorrow and I will have a full roundup of all 13 manis on Halloween! Have a great rest of the weekend.

13 Days of Halloween Nails - Day #11 - Blood Drips

Image
Sorry for the late post. You would think one would learn to schedule posts but I have been brain-dead for the past few weeks. I have another Halloween themed mani for you today. This is a drippy mani and  I have tried one of these before for the 4th of July and knew I wanted to try it again but in a more PSYCHO type way. OPI Skull & Glossbones - Greige Base China Glaze Phat Santa - Blood Drips I think I succeeded! I really like how this came out and it looks very creepy. Sorry for the short post but I am still down with my back and trying to do anything seems like a real hassle.

13 Days of Halloween Nails - Day #10 - Ghost & Franken

Image
Hi Guys! A little late of a post today but I had some homework to do. I also sucked it up and went to work today with my back completely out. Let me tell you that was fun! I have for you today a ghostly mani I did using one of my first frankens ever! I started off with a base of Essie Midnight Cami that a fellow blogger Bottle and Bottles of Polish gave me. I then added a coat of my first franken ever that still remains nameless. I made this franken using the bottles of silver holographic glitter that Fantasy Makers had for sale at various places. I actually picked mine up from Walgreen's and of last check they still had some. I barely even used any of the glitter and I have made 3 frankens already. The bottle I am holding in the photo is the franken I used for my ghostly mani. It is just clear base and sparkles. The polish does settle quite a bit (like after a min. actually) but I added some BB's and all is well in franken world. Essie Midnight Cami - Blue Base Un-named Fra

13 Days of Halloween Nails- Day #9 - Tombstones

Image
Welcome to 13 Days of Halloween Nails. This is day #8 and I have a fun post for you today. It will be short as I am lying in bed with my back completely out! Anyways enough about my helplessness for the moment and on to the mani. I really wanted to do like a graveyard type mani. I had this idea in my head and while it did not translate that well I was not completely horrified with the results. OPI Swimsuit...Nailed It! - Blue Base of all Nails NYC Starry Silver Glitter - Glitter Top on all Nails Wet n Wild Black Creme - Black Cat, Words on Tombstones Sally Hansen Mellow Yellow - Cat Eyes Sally Hansen Wet Concrete - Tombstones OPI Don't Mess With OPI - Green Grass As you can see the "black cat" did not turn out that well, but hey, it was my first cat. I wanted to make it look like a nighttime scene so I used OPI Swimsuit..Nailed It!. I layered NYC Starry Silver Glitter over the blue base to give it some sparkle as well as to make the sky look like it had stars! I hope yo

13 Days of Halloween Nails- Day #8 - Lynnderella & Spider Web

Image
Today is Day 8 of 13 Days of Halloween Nails. So I have to say that I have been doing these 13 manis for the past couple weeks and I have so much new holiday polish that I had to combine some. I have been dying to try my Lynnderella Snow Angel since I got it and I must say I am kind of in love. Now this is a layering polish although if you wanted to cake on this pricey polish I suppose you can but I am a conserver. I have seen this polish layered over many white/eggshell polishes and I wanted to twist it up a bit for my Halloween mani. I decided to layer Snow Angel over OPI Skull and Glossbones. Skull and Glossbones is a murky greige (gray-beige) creme. OPI Skull and Glossbones - Base for all Nails Lynnderella Snow Angel - Glitter Top Coat LA Colors Black Striper - Spider Web Now I must say this Snow Angel is one thirsty gal. I put two coats of Seche on top of Snow Angel and it still felt gritty. Snow Angel dries very fast but dried to a finish that felt more like sand paper. I hav

13 Days of Halloween Nail Art - Day #7 - Blood Red Feather Mani

Image
I recently got an awesome nail mail package of Wet n Wild Behind Closed Doors from the On The Prowl Collection. I am in a Facebook group called Polishaholics Anonymous and fellow nail addict BeePolished had a few of these for sale and I had to have! This polish is a black jelly(gray) that has red micro glitter as well as red hex glitter. I loved this polish on first sight and was very afraid I would never own it. So thanks Bee! I used a feather from Michael's that came in a mixed colorful bag. I simply cut down the feather to fit my nail and stuck it to a tacky nail. Two coats of top coat and I could no longer feel the feather on my nail. I have so many colored feathers I can't wait to try out some new combos. I tried to conserve on Behind Closed Doors so I layered it over Wet n Wild Black Creme. Wet n Wild Black Creme - Base of Behind Closed Doors Wet n Wild Behind Closed Doors - Red Layering Glitter Love My Nails Seductive Red - Red Base for Feather Feather from Michael'

13 Days of Halloween Nails - Day #6 - Pumpkin Nail Fail!

Image
Sorry for a late post again! So I really did not even want to show this mani because I did such a horrific job but there is 13 days and I only have 13 ideas. So for that fact I am posting this attempt at a pumpkin mani. I guess this is my chance to ask for feedback. What tool is used best for small details when doing nail art? I have used it all but have not found anything that works really well for small detail i.e. corners, curves, words. Are there like pens or something I don't know about that would help me in my nail art efforts? Any who, on to the pumpkin fail. Wet n Wild Sunny Side Up - Pumpkin Orange Wet n Wild Black Creme - Pumpkin Face

13 Days of Halloween Nails- Day #5 - Candy Corn

Image
Good Evening! Sorry this post is so late today. I had to work and get some homework done and forgot about the blog :(  This is day 5 of 13 Days of Halloween Nails and I have a super cute mani to show you today, Candy Corn. This mani caused quite the drama because I had to find some good polishes to layer that weren't so sheer. I finally found a good orange and I actually had a yellow that worked fine, but that did not stop me from searching for the perfect yellow. Which I never did find by they way. I did this whole mani free hand so don't think I am blind for messing up the lines. I personally have never seen a perfect candy corn so I figured mine didn't have to be either. I wanted to make it sparkle so I topped the whole thing off with China Glaze Golden Enchantment. I hope you guys are enjoying this series! Wet n Wild French White Creme - White Corn Wet n Wild Sunny Side Up - Orange Corn Sally Hansen Mellow Yellow - Yellow Corn China Glaze Golden Enchantment - Sparkly T

13 Days of Halloween Nails- Day #4 - Broken Bones

Image
I have one of my favorite Halloween mais I have done so far. Did I say that it was super simple as well. I started off with a base of Wet n Wild Black Creme. I then took my Sinful Colors Nail Art Striper and made diagonal lines on my nails. I then dipped my bobby pin in white and made two dots to illistrate the end of the bone. This mani took me all of 5 minutes to accomplish and everyone was pretty impressed. On another note I finally got my hands on Wet n Wild Behind Closed Doors from the On The Prowl Collection! I was so excited that a girl from a facebook had some extras and was willing to sell them. I have it on right now for a upcoming Halloween mani and will show you guys soon!

13 Days of Halloween Nails - Day #3 - Mummy Nails

Image
Welcome to the third day of 13 Days of Halloween Nail Art! Today I have yet another super easy mani I did. I painted my nails with Wet n Wild Black Creme and used my white striper to make the mummy lines. I had red eyes for all the mummy's but it was not showing up so well so I decided to use some color. I really liked how these guys turned out and it was way more easy than I thought it would be. Sorry for the quick post! Wet n Wild Black Creme - Base for All Nails Sinful Colors Bad Chick(white striper) - Mummy white Sinful Colors Happy Ending - Green Eyes Sinful Colors Beverly Hills - Purple Eyes Sally Hansen Blue Me Away - Blue Eyes OPI That's Berry Darling - Pink Eyes

13 Days of Halloween Nails- Day #2 - Hanging Spider

Image
It's day two of 13 Days of Halloween Nails and I have a super easy mani to show you. My boyfriend actually came up with this idea so I can not take all the credit. I hope you all are getting the effect that it is supposed to look like it is hanging on my nails. I made the spider from a nail decal I got from Wal-Mart. I painted the back of the decal with China Glaze Ruby Pumps to make it red and sparkly! The best thing about the decal is that it glows-in-the-dark. Wet n Wild Silvivor - Base of All Nails LA Striper Black - Spider Web, String

13 Days of Halloween Nails - Day #1 - Dracula Nails

Image
Finally it's 13 days until Halloween! I have amazing Halloween manis lined up for the next two weeks and today is one of my favorites. I decided to try and make a Dracula on my nail and it worked for the most part. I did not want to do the design on all my nails because 1) It's too busy 2) It's too much work! I decided to grace the rest of my nails in the most amazing polish ever, Connect the Dots. This is a Lynnderella polish and I am so glad that I own one now. I hope you guys enjoy this series as much as I have coming up with ideas. I have a piece of paper with chicken scratches all over it of ideas for the next two weeks. I have completed some and I must say I am proud of myself. I really have never attempted much nail art because to be honest my stick figures are pathetic but I am getting the hang of this!  Love My Nails Seductive Red - Red under Connect the Dots Wet n Wild Black Creme - Hair, Eyes, Mouth, Nose Wet n Wild French White Creme - Eyes, Fangs China Glaze

Milani 3D Holographic - Hi-Tech

Image
I finally made my first trip ever to a CVS! I have one about 45 minutes away from me but have never been. I did not find much as in Wet n Wild On the Prowl but I will make it. I browsed the nail isle briefly as I was with my BF and his brother. I did not find a lot like I said but I had seen posts about the green Milani 3D Holo and I had to see for myself. This baby was $4.99 which is pretty steep for Milani, I think. I only have one other polish of theirs and it was a neon and it's not neon. Not even close. Oh well this baby is gorge! I love the golden holo effect of this polish. It does have a rainbow effect if you turn your hand down and the result is the photo above. This polish dried extremely fast and a top coat did not hurt the holo effect at all! Happy Sunday Everyone!

Mini Haul!! Lynnderella's and Muppets!

Image
Finally got my nail mail I had been anticipating. I went in with a group of girls for a Lynnderella buy and I also got a great gift from my mommy! On to the photos... I have Connect the Dots on my nails right now! It is such a cool polish. I am still on the fence about snow angel but I have not even used it, so what am I talking about!(I thought it had more flakies) Getting Miss Piggy With It. Fresh Frog of Bel Air, Divine Swine Gone Gonzo!, Excuse Moi!, Rainbow Connection Meep-Meep-Meep Gift Set with Lip Gloss, Warm & Fozzie Well that is all for today! I hope you guys are having a great weekend. Remember Tuesday will start the beginning of 13 Days of Halloween Nail Art. I can not wait to show you what I have created! 

OPI DS Designer!!!

Image
Here is another one of my great finds from my b-day trip. I got this polish for FREE!(as a gift) and I could not be happier. It is only a half bottle so basically it is like liquid gold and must be layered to conserve it. I had no idea what to layer this over and then my bf chimed in "what about the tan from the Texas Collection you have". I was floored when he told me what polish to use and he was actually totally correct. He is awesome! I used two coats of OPI San Tan-Tonio and one coat of OPI DS Designer. I really like the look of the DS Holos. I like the more scattered holo effect as compared to the linear. I like this polish a lot because it is such a classic color with a totally modern twist. I need to keep an eye out for a full bottle of this baby! I love her so and it still feels like a crime to remove this polish :(

L'Oréal Project Runway - Owl's Night

Image
So here is the second polish I got from the Project Runway L'Or éal Collection. I must say this is the one I wanted more than any other. This polish is pretty spectacular. It is a really greyed-out blurple base with tons of mirco gold/green glitter. This polish is way more awesome in person. A photo does not do this justice. I suggest you pick this up if you havn't already! That is all today my loves!

Purple & Black Feather Mani

Image
Hi guys! Long time no post. Been busy as usual but I had to show you some manis that I have backlogged before I begin 13 Days of Halloween Nail Art. I will start this series on October 18th and it will run through Halloween. I have started on some cool manis for Halloween but I broke a nail really far down so I am having to rethink some now. Now today I have a great feather mani to show you. Now I must admit I did not get on the bandwagon of the feather craze. Now I have seen quite a few feather manis floating around but I did not want brown feathers on my nail. Thought it looked kinda gross. I found a great bag of assorted feathers at Michael's for $2.99. It is a great collection of green, blue, purple, red, fuchsia feathers. The feather I chose for this mani was black and purple. I chose to pair my feather mani with OPI Planks A Lot. Now I must tell you that I could not get an accurate color on this one. This polish is darker in real life. I just could not get that to translate

Wet n Wild - Under Your Spell

Image
Hello All! I have a vampy polish to show you today. This is Wet n Wild Under Your Spell. This is from the mega-last line. This polish was quite sheer so I paired it with Wet n Wild Black Creme. This would have been a great polish for Halloween considering it's color and the name! This is a great polish for fall however. I love that it's turning colder and I have broken out much more of my darker polish colors. Its kind of like my hair, I always want it lighter in the summer and darker in the winter. Although, I look awful with light hair. This polish as always went on very smoothly and dried fast. What colors are you loving for Fall? Side note as well: Have you made your polish x-mas list and if so what is on the top? Mine is Glitter Gal Lizard Belly. Follow Wet n Wild on Twitter Follow Wet n Wild on Facebook Visit Wet n Wild Website *Polish sent for honest review

L'Oréal Project Runway - Raven's Strength

Image
So this is the first of two polishes that I have to show you from the Project Runway Collection. This is Raven's Strength which is a gun-metal grey polish with a great frosty shimmer. The shimmer is a tad bit streaky but I could have maybe fixed that with one more coat. I really like the formula on these L'Oreal polishes, they were almost one coaters. This was my first nail polish buy from the L'Oreal line and I will keep my eyes peeled for future ones because I really loved this polish. I really wanted to try some of the makeup from this collection but never got the chance to purchase any. Did anyone stock up on any Project Runway L'Oreal Collection makeup or polishes? Who is your fave on Project Runway this season? Mine is Anya

OPI - Uh-Oh Roll Down the Window

Image
So this is a polish I got for my b-day which seems like ages ago now. I wasn't too impressed with OPI Touring America collection but I really wanted a great army green. I also really loved the name of this polish. This polish applied like a dream as most OPI cremes do. Uh-oh Roll Down the Window needed two coats to be totally opaque. I want to get some dotting tools and do a great camo mani with this one. Hopefully I will do that soon. In the meantime I would love to know what are your favorite army green polishes? There seem to be a lot of these shades this fall. My fave would have to be Zoya Yara.

My First Deborah Lippmann!!

Image
I won a giveaway!! Miss Mele had a $25 Apothica gift card giveaway and I won. I had no hesitation when it came to what I was going to buy, DEBORAH LIPPMANN! I debated between Lady Sings the Blues and Across the Universe. Lady sings the blues eventually won out and I purchased it immediately. My polish came super fast and I could not wait to use it. My first attempt at using this polish was not so successful so this is actually my second attempt weeks later! The glitter in this polish seems to have a mind of its own. Sorry for the tip wear. I started typing up a paper after I painted my long nails. Yes these are long for me. I cut my nails not too long after this photo was taken. I just feel dangerous with nails this long. I ♥ my nubbins. This polish is a dark navy creme with silver hex glitter and square silver micro glitter. I liked how the blue laid over some of the big square silver glitter pieces in a light way that made them look lilac. This polish was almost a one coater if y

Wet n Wild - Private Viewing

Image
Happy Monday! I have been super inconsistent in posts and I am going to try and post a lot this week. I have so many manis to show you it's ridiculous. I have such a backlog of photos and I keep buying more polish! Well on to todays nails. This is Wet n Wild Private Viewing. This polish is a great peachy nude shimmer. I love the shimmer in this polish and I actually like how it looks on my skin tone. 2 Coats of Private Viewing I have very few nude polishes but I am starting to like them a lot. What are your favorite nude polishes? Follow Wet n Wild on Twitter Follow Wet n Wild on Facebook Visit Wet n Wild Website *Polish sent for honest review